Thursday, January 22, 2009

Aircraft Rules for Price of Glory ala Chalfant Pasha


I have lifted these rules suggestions from a response Chalfant recently posted on the Iron Ivan Yahoo Group (I have reformatted them for this Blog):
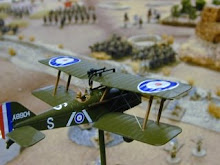
It's been asked before for WWI aircraft, really I should just put together something for it. I have tried to decide how to make WWI aircraft a little different..... the following would be a WWI synopsis, somewhat modified from the WWII....
  • Basically, the WWI plane comes on the board, makes an attack, then exits before the start of every turn (or how many turns you nominate, or every other turn, whatever works for the scenario).
  • On-board, the plane moves in a straight line and may attack any unit along that line, but only using each weapon group once. All MGs are a single group, bombs would be another group. Figure RoF 2 for each MG (yes, they should be 3 or 4, but this is how they work for aircraft).
  • Now then, the MGs have an ACC 4, and are modified by cover as normal. Bombs are ACC 3, except they are not affected by the cover modifier of buildings.... if you hit you instead have to penetrate the roof.
  • Target must save vs [Courage] as normal with -2 for every MG fired, -1 per casualty.... the MM of the class of bomb (Light, Medium, Heavy....) that is used. Figure light bombs for most WWI aircraft 50 lbs (25 kg or so)... maybe Medium bombs 100 lbs (50kg or so).
  • Pins also activate the target unit into the following turn.
  • However, ground units can shoot at the aircraft. Any unpinned unit may try to shoot the plane as it passes, it must be in LOS. It is activated (which counts into the following turn!) by trying to shoot the plane regardless of whether or not they hit it. Only units with at least 4 rifles, or 1 MG are allowed to try this. If you have artillery that you think was deployed in the AA role (most were not) they you may also fire this.
  • You need 1's to hit... the unit of riflemen get a single d10, the MG would get a single d10, and the artillery would get a single d10, it is not for every model or for the RoF of the weapons.
  • If the plane is hit once, it may make no further attacks and must exit the board never to return. If hit twice or more, it is destroyed. If hit by artillery it is considered destroyed automatically
  • If hit by rifle fire, the plane gets a saving throw vs the attack, on a 5 or less it ignores the hit. If hit by MG fire, on a 4 or less it ignores the hit. It may not attempt a save from an artillery hit.
  • On a standard board, a destroyed plane will crash off board.
  • Effectively for our purposes, the only differences from one plane to another are the number of MGs and what/how many/if bombs are carried.
  • Once you use planes once, it becomes pretty clear how they work, they are very simple to employ. Just keep track of the bombs dropped, and how many turns you allow them to operate. Assume MGs have enough ammo for the entire game.
I might tweak this concept later on, but should work for you for now."

Reproduced without permission from http://games.groups.yahoo.com/group/ironivan/

Sunday, January 18, 2009

2009 to do list....


I'll follow Jim's (Napoleon's HQ) example and set my "gaming goals" for the year.
  1. Play at least one actual game every 6 weeks. Hard to do with two tots running about, but one must try. I'd like to be able to RUN a game at least twice a year (if not more).
  2. Get enough Western Front WWI figures painted to actually help Jim in his forthcoming April WWI game. Right now there are LMG teams in the super-glue/ pre-primer stage; these will be painted next after I finish the 4 Sikhs I'm finishing up now.
  3. Stay ON TASK! I've been at this WWI thing for about 18 months non-stop and I'm beginning to get somewhere. My biggest enemy is drifting interest and rules geekishness (a desire to try out interesting rule-sets). Luckily I've got lots of reading material to keep me focused. Biggest potential distraction currently: North Africa WWII. But why would I go there.
  4. Reduce spending on lead. More accurately buy with the project in mind. There should be lots of good stuff coming out from Woodbine and Artizan/ Brigade so I should try not to drift off into... other things... so NO (more) impulse purchases of unpainted Minifigs Indian Mutiny figures, 10 mm Pendraken WWI or Conquest Seminole War figures!
  5. Paint the lead I have. (See earlier posting). I've got at least 75% more figures for each side. That's really enough to last me through the year, if I let it.
  6. Buy terrain & scenics. This is where my money should really go, since it actually goes on the table instead of sitting in a box in a cabinet. Money spent here translates directly into better gaming.
So there, for what it's worth. You can call me on it when I stray from the path.

Sunday, January 11, 2009

Solo Square Bashing Game


It was a very rainy Saturday and the family were out-of-town. Rather than break in my new hiking boots, I set up a very small game of Square Bashing (420 points) on my 3x5 dinner table. I've never played with these rules before but their "boardgameness" appeals to me as do the the claims that the game was easily playable in under three hours. So, even though I couldn't find my desert felt for the table, I set up a solo game.
The setting was, ostensibly, Mesopotamia. There were 3 closed squares and one redoubt (
L1 hasty defense) in the center of the board.
The
British side was composed of
One Infantry Brigade:
  • 1 British Infantry Battalion (Regular)
  • 2 Sikh Battalions (reg.)
  • 1 Gurkha Battalion (Professional)
One Cavalry Brigade:
  • 1 Regt. British Lancers (Professional)
  • 1 Regt. Indian Lancers (Professional)
Two MG Companies
One 18lb Battery (Regular)

1 Light Motor Battery (LAMB) (2 Armored Car models)
1 HQ

The Turk's force was composed of:
2 Infantry Regiments each composed of 3 Infantry Battalions (Regular)(one bttn. was reduced by a stand at the game's start)
1 Cavalry Brigade
  • 1 Cavalry Regt. (Reservist)
  • 1 Mounted Bedouin Band (Reservist)
2 MG Companies (Regular)
1 FK98na Battery
1 HQ
1 Fortification (the Redoubt, L1)

Terrain was as such:
Turks
1 2 3 4 5
OOOOC
a C(a5)=Village with trees
CCROO b C(b1)= Scrub C(b2)= Sand Hills R(b3)= Redoubt
OOOOO c
British

I will "briefly" play out the game for you
  1. I randomly generated both sides orders, the Turks were adjusted lower than the Brits and began the game as the defenders. They set up in a3= arty & H; a4= 1 Infantry Bttn, Arabs and cavalry; b2= 2 infantry Bttns & 1 MG Coy; b3= 2 Infantry Bttns & 1 MG Coy.
  2. The Brits set up is c2= 1 MgCoy, 1 Light Motor Btty; c3= HQ, 18 lb Btty, 2 Bttns Sikhs; c4= Cavalry Bde, 1 MG Coy, Bttn British Infantry, Bttn. Gurkha Rifles.
  3. First Turn: Brits advance into b4 from c4. Barrage attack (type A) by the 18lbers on the redoubt in c3 (ultimately pointless). Turks attack from b2 into c2 but their MG coy gets hung up in the Sand hills and is left behind. They destroy one Armored Car & lose one stand of infantry. Both sides pass their Morale.
  4. Turn Two: British bombard the Turkish battery in a3 to no effect. Turks bombard b4 to no effect. British Cavalry lead the charge against the Ottoman force in a4. Both sides lose a stand and pass their Morale and so the battle continues. British troops withdraw from a2 into a3 where the Sikhs help to defend them. Turks follow up by occupying a2.
  5. Turn Three: British continue to push the attack against a4. They are joined by the remains of the LAMB and deal a pretty serious hit to the Turks who have themselves been reinforced by an Infantry Bttn from the redoubt. Again the Brits and Turks are at a draw with 2 cavalry stands lost on each side. Both sides fail one Morale Check ad thus are prevented from attacking or moving the next turn. The Turks attempt an attack on c3 but are repulsed by heavy MG fire and stalwart Sikh defenders. They fail their Morale and, again, may not move next turn.
  6. Turn Four: The Turks reinforce their redoubt with the MG coy from c2. The Brits move the 18 lber Batty into c4 and begin to bombard the Turks in a4. A quiet turn as everyone recovers from the attacks in Turn three.
  7. Turn Five: British artillery fire begins to tell on the Turks in a4. They move their own battery (and their HQ) into this square and are promptly destroyed in the following scrum. An all out attack by the British units in b4 ensues and the turkish player loses most of his arabs, cavalry, his HQ and his battery. He is forced take extra casualties as the loser who cannot retreat off the board edge.
  8. Turn Six: The Turks withdraw from a4 into a3. The game ends and the British, with a 10 point victory, are declared the winners, giving Johnny Turk a "Bloody Nose."
Over all an enjoyable game, though I much prefer a club game with actual opponents. The rules are more sophisticated than they initially appear with very small things (such as attack or defense values) causing you to use units in a doctrinally appropriate way. Cavalry is worthless in defense and thus is played very aggressively, but almost always takes the first hit; MGs worthless in the offense but really powerful in defense and thus are usually only moved in to secure or reinforce a square. The game doesn't really look right in 28mm when played on a small table and if using a club sized table (ours is 8x12) I would make the squares 24 inches across. Massed attacks would look better with 10mm or 15mm figures, as they would better resemble the formations used historically. That being said the game is not intended for 28mm figures and the bases I used were probably 25% larger than suggested by Peter Pig. For the middle-east I should have also used the RCW cavalry flank movement rules.
If you want a fast, fun WWI game that actually seems to work Square Bashing is still a good option after 10 years of existence. Not for the super-detail minded (for you there is Bloody Picnic or Great War Spearhead) but clever and quick
http://www.peterpig.co.uk/rules.htm


Wednesday, January 7, 2009

Tigers Along the Tigris


Tigers Along the Tigris: The Leicestershire Regiment in Mesopotamia During the First World War
By E. J. Thompson
Published by Leonaur Limited, 2007
ISBN 1846773660, 9781846773662
144 pages

I am reading this book currently and am quite enjoying it. It details the authors experiences in the Battles between Baghdad and Samarra in 1917. For wargamers it's a treasure trove, as he has detailed info on each of the battles the Meerut Division participated in and has included hand-drawn maps. Interspersed with poetry and wit (Thompson's commander, Fowkes, quoted Shakespeare saying "He that hath no stomach for this fight, let him depart" to soldiers sick from water-borne disease right before one engagement) it's a very enjoyable and informative book. Personally I find it great because each battle has Sikhs, the Tigers and Indian Cavalry all of which we have available in the club miniatures pool.

Sunday, January 4, 2009

Conflict of Heroes


http://www.conflictofheroes.com/
I bought this board game around X-Mas as a kind of gift to myself. It seems to be everything I have wished for in a tactical WWII wargame and more. I got Tide of Iron, but did not like it: I did not like the little plastic miniatures of ToI nor the clumsy removal of pieces from a stand to track casualties. I also found Tides of Iron's set-up and playing time to be longer than I hoped for in a "streamlined" game. Why not use counters? If you use big hexes (and the hexes on ToI boards are huge) and big counters then you remove one of the main annoyances of earlier Avalon Hill games: teetering stacks of counters on tiny hexes. Also gone from CoH are the leader and weapons counters of the Squad Leader games, almost unnecessary except to the OCD gamer. blah blah, you can read much better critiques on Board game geek. (http://www.boardgamegeek.com/game/24800)
Though unplayed as of yet it looks like a really good game. And the counters are illustrated with photos of nicely painted minis!