Sunday, December 20, 2009

ACW is what I'm doing


So I've been slogging away at some Crusader "Rank & File" ACW figs and will continue to do so until I can't stand the sight of Blue...
These figs are really well done. They are true 28mm and maybe a bit on the slim side (which I like). Currently this range is very much unfinished and all packs are essentially variations on the the right shoulder shift pose.
I am choosing to not shadow or highlight any parts of the figures except for the fleshy bits since I do not want to mess up the shades of Blue I am using.(tangentially I had to return to Testors to get the right shade of Blue for my Frock Coats, though I may try some of the Foundry Napoleonic colors).

I have been reading the excellent book Decision in the West which is about the North Georgia and Atlanta campaign. For whatever reason I have read much more about the Western campaigns than the Eastern (in particular Bragg's invasion of Kentucky through Atlanta) and it looks like that will probably continue. Problem is (and it's not really a problem) our 28mm ACW armies at the club are based more around 1862-1863 Eastern forces. Actual gaming Effect? None. Especially since we are using "generic" regiments of 20 figs. I am going to base three bases (command stand + 4 coys of infantry) on a 4 figs per stand system and then base the other 4 coys on half stands so they can be deployed as skirmishers.

Sunday, November 22, 2009

100th Post


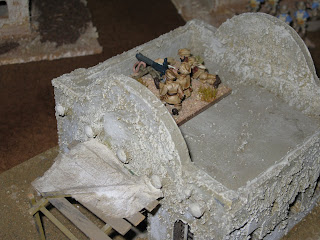
I have been off in left-field, where I will be for a while it seems. After an October Guns at Gettysburg game I decided to take a break from the WWI project and attempt to finish up an ACW Brigade for GaG. Unfortunately units are between 16 and 24 figures which for me is a long time. But I'm taking the plunge and starting on some Crusader figs, I've finished the first two coys. (1 Stand) as seen in the startlingly bad phone photo above (I've lost my camera temporarily. I already have 1 regiment of Renegade figs that I painted 4 years ago, they tower over the Crusader figures, but that's okay.
In my usual manner, gaming and reading go hand and hand so I have shifted to reading some ACW titles.
This Blog was created to specifically deal with WWI and Colonials, should I post off-topic stuff if it looks like it will be the main focus for me for a while?
Let me know if you care...

Friday, October 9, 2009

Boardgame: Trenches of Valor


Trenches of Valor

Boardgame 2009 Victory Point Games
Designed by Pelle Nilsson

I’ve now played three scenarios of this game (1, 2, & 4) and thoroughly enjoyed each one. It is a super-fast, simple and fun game that brings tactics to the front while managing to neatly preserve the concerns of trench raiding.

Components
The game plays in around 15 to 30 minutes with a small number of components on a small (11x17) game map. The game is Definitely in the micro-game tradition but with better components. The game uses nicely sized ¾” pieces that have good graphics representing Hand-to-hand, grenadier, rifle, LMG and MG units. Each of these units represents anything from a team of 2 men to a squad of 10 depending on the scenario and the quality of the men. All information is conveyed very well and I did not feel like I had any real confusion about any rules. The counters are mounted and die-cut but aren’t coated. The map is printed on heavy card-stock in full color. Most information you need to play the game is reproduced on the Map itself. The design of the map and its functionality as a component in a wargame is perfect. Personally I am not a fan of obviously computer-generated graphics and I’d love to see a hand drawn version of the same map. For that matter, I’d pay a lot to have “euro-game” quality components.

Play
What I like is how I am focusing on tactics the whole time. In my first game the Germans are raiding and attempting to eliminate two Lewis Gun posts. The raiders chose a very straightforward tactic, using one unit of grenadiers to block reinforcements to the isolated LMG post. This worked but the Germans didn’t win because they were still on the board at games end. In ToV you get many of your VP (usually around ½) from exiting raider units back in to No Man’s Land (before the box barrage lifts). I have found that this aspect of the game needs to be given as much attention as any other tactical consideration. When in the third game the Canadians quickly eliminated a German Maxim position, focused the remaining German units’ efforts on denying an easy exit to the raiders who quickly ran out of options for gaining the VPs they needed to win. They could only attempt to kill the last Maxim, which was too well protected in its fortified position and survived repeated grenade attacks.

So, based on the three solo-games I’ve played so far, I would give this game a glowing recommendation. Play is quick so you may wish to play multiple scenarios in a session.

The game designer writes that there should be a expansion kit out in the near future. It will feature leaders, Engineers, flamethrowers and more scenarios. I will buy it the minute it is released. My wish is for a myriad of counter-sheets to be released to allow for scenarios in other theaters and also for some additional types of maps that would allow scenarios in No Man’s land and against other fortifications (concrete emplacements, fortified shell-hole complexes, underground French forts).

Wednesday, October 7, 2009

Painted Figures from August and September

If you ever doubt the slowness of my painting, this is proof. What I painted in August and September, of course the bases aren't done:

A Battle Honors KAR officer & a Battle Honors British NCO painted as a South African

Another view of the KAR officer and the first two BH "British Askaris" which means KAR in pill-box hats

The Backs of my BH Arabs and a stand of Brigade Games Arabs, my daughter is helping you to notice these figs

My BH Arabs, blurry, with some BG Arabs. The Arab leader with the sword is a figure converted by Helen and painted by me.

A unit of the new Artizan / Brigade Games Arab Revolt Irregulars

A Lewis gun team of Arab irregulars

Now I'm working on Sharifian Regulars and Irregular Cavalry. I'll propbably do a solo game on the 17th.

Sunday, September 13, 2009

Link to article on the 1920 revolt


Here is a link that might be useful:
It's an article entitled "Story of the Siege of Samawah" from Blackwood's Magazine no. 211 (1922)
http://books.google.com/books?pg=PA100&dq=blackwoods+siege+of+samawah&client=firefox-a&id=ZuYCAAAAMAAJ#v=onepage&q=&f=false
Absolutely thrilling read in the finest colonial style and chock full of scenario ideas. Print it out because you'll want to keep it.
The still is from "The Lost Patrol" which is vaguely set in Mesopotamia in either the 1920 revolt or the Great War. (I lifted it from some random internet site. BUY the movie because you must have it.)

Sunday, September 6, 2009

Mesopotamia WWI Price of Glory Game Report


Game Date
: Saturday Sept 3, 2009
Rules Run: Price of Glory (but i used the vehicle hit charts from "To the Last Man)
Players: 4 + GM (me)
Played at:Yankee Peddler Wargames Club, almost all terrain Club terrain
Setting: Mesopotamia, October 1916 somewhere north of Kut al Amra
Scenario: A British detail, lead by a Lieutenant Frost, is cut-off in an Arab village where they had been attempting to woo the locals. Instead the local tribe sold him out to a nearby force of retreating Turks. As dawn breaks the Turks are besieging Lt. Frost inside the village while a small patrol of British infantry, Indian infantry and a section of Armored Cars comes to the aid of the beleagured detail.


Defenders: Ottoman Turks and local Arabs
John:
1 Platoon Ottoman Infantry (5 sections with a total of 42 OR, 5 NCOs and an HQ group of 1 junior officer with a senior NCO and water-boy; Conscript Courage)
2 Maxim Gun teams

Jim:
1 ad-hoc Arab Band (53 figures, divided into 5 units; armed with obsolete rifles; conscript courage; disband instead of route on third morale failure)
1 Arab Cavalry unit (12 figures cavalry & camelry; obsolete rifles; conscript) [many arab figs painted by Jim]
1 Turkish Cavalry Unit (12 figures; conscript)

Attackers: Indian Army
Todd:
1 Platoon British Regulars (2 Rifle sections 8 figs + NCO each;2 Lewis gun sections, 4 figs + NCO each; 1 HQ group: Lt. + 2 man escort)
1 British Vickers MG
1 3.7" Mountain Gun
1 Section Light Armored Motor Battery (2 Rolls Royce Armored Cars,1 Model T scout Car)
1 Bi-Plane in a ground attack role (played by a Se-5)

Eddie:
1 Platoon Sikhs (3 Rifle sections 8 sepoys+ NCO each, 1 section had a lewis gun; 1 HQ : 1 Lt. + 2 sepoy escort)+ 1 Section Gurkhas (1 Rifle section of 8 sepoys + NCO)
1 Sikh Vickers MG
Lt. Frost's Detail (10 Riflemen, 1 Lewis Gun team, Lt. Frost)


The Game:

1. The British started with the initiative and moved towards the village. The Turks and Arabs exchanged fire with Lt. Frost's detail. Arab cavalry rode into the village, while the Turkish cavalry swung wide around the north end. The LAMB Section rolled up and began to hose the Turks in the orchard and fields on the Western flank of the village. The Mountain gun lobbed a shell in town. The Se-5 made a strafing run and suppressed several arab units; unknown to Todd, he had taken minor damage from ground fire...


2. Lt. Frost and his men continued to fire at the turks across the alley from them. The Brits and Indians moved up to the edge of the palm groves and began to exchange fire with Arabs and Turks (respectively) in town. Eddie's Sikh HMG got into an outlying building and set-up. Todd's scout car moved forward but took fire from the village, killing a crewman and suppressing the vehicle. The rest of the LAMB stayed in place and continued to hose the Turks who, in turn, spattered the RR ACs with Maxim fire, unfortunately to no effect. In the town, Jim's Arabs began to move into better positions for the defense. Todd's Biplane starts another strafing run but experiences an engine fire and crashes just past the building in which Lt. Frost and his men are occupying. The crewman bails out with a lewis gun... (and is promptly killed by Turkish fire from the Cavalry unit in the next turn)


3. Some of Todd's Brits moved into contact with a heavily defended building in the town. At the same time he wheeled one RR AC in front of the village. Jim moved his Arab Cavalry out of the village and ineffectively fired at Todd's assaulting British. The Arabs then took heavy fire (from a whom I cannot remember) and were forced to fall-back into the village. All the while the Indian troops were successfully whittling away at the Turks in the village and in the orchards. Unfortunately for him though, the Turk Maxim in the orchard continued to remain unbowed. The 3.7" gun continues to shell the town, to little effect.


4. The British Regulars lob grenades into the Arab building to their front and make a charge, the Arabs take casualties and fall back before a melee ensues. Todd follows this up with a second assault on another part of the building. Again, grenades are thrown but this time a melee follows and though the Brits have the initiative they are repulsed. The Turks begin a determined assault on Lt. Frost's position that is loosely coordinated with an Arab assault by Jim, both are driven back by Suppressions caused by Frost's Snap Fire. Frosts detail is down to the Lewis Gun team, two rifle men and himself at this point. An Armored Car whips forward and begins to fire at the Turkish cavalry, they wheel and charge the vehicle, hoping for an "improvised close assault", but fail their pre-charge courage check and thus are stopped in the olive grove they have been occupying. All the while the Indian troops are still attempting to force the front of the village while receiving a withering Maxim fire and Turkish volleys; they find they are unable to assault the village.

5. At this point the pre-arranged end time arrived at the same time as the Arab forces decided to skedaddle due to heavy casualties; this in turn led to a loss of nerve in the now greatly outnumbered Turkish forces. I called the game as a pyrrhic British victory since Lt. Frost was still alive


The Table around the beginning of turn three:


Conclusions: I think was the most fun we've had with the P-O-G rule so far. We play on a 8x12 table so the most common problem seems to be setting up infantry to far from their objectives. In retrospect I would have started the Imperial forces about 12" further on to the table. Comments were made that the Ottoman side should have had some kind of vehicle killing weapons, but I'm not sure this was really necessary. The Turkish HMGs scored at least 4 potentailally effective hits, but just happened to roll bad on the hit location chart from "To the Last Man". Maybe I should have given the HMGs some K ammo (the German AP rounds) but I'm sure these weren't available at this point in the war and may have never been available in Mesopotamia (though the AC instructional manual from this time and theater specifically mentions it.) I'm not sure if a field gun would have been of much use, since they are so immobile.

I really think the Imperial players could have gotten further with more aggressive play, especially the L.A.M.B. which could have been more effectively utilized in the first couple of turns. The game would have been lost by the Brits if Lt. Frost's snap fire against the two groups that assaulted him had not been so unusually effective.

Monday, August 24, 2009

Figure Photos


Here are some photos of my arabs (almost all Battle Honors) and the Indian Army figs that I have completed recently.The Sikh Infantry and MG team are Copplestone. The kneeling Sikh NCO with the MG is Brigade Games and the 3.7" Mountain Gun and team are Battle Honors.
I will be taking some better photos on my new camera soon, I promise.

Sunday, August 16, 2009

Crossfire Colonial WWI Thoughts

Before I began to play in a club I gamed Crossfire quite often. It was, by far, my favorite set of rules (though WWII is not my favorite period to game). But my opponent moved away and I have never thought that I would be able to pull off a club game using these rules; so a number of years have gone by since I have thought to play it. What I forgot is that Crossfire plays as well as a solo game as it does a two-player game. So when the opportunity arose to put on a little game at home, I decided (after much worrying) to set up a small game on my small dining room table.

I used the standard Crossfire rules in my game with the following exceptions:

Armoured Cars: I allowed the Armoured Car 3 actions per initiative. Armor was 1/1. If you wanted to limit the aggression of ACs allow rifle fire to blow out tires on a “kill” roll (3 x 5 or 6). The firing player would lose the initiative (or fail to seize it) if he failed to blow out the tires. Tires may be changed as an action, which can draw Reaction Fire.

Command & Control: Infantry Platoons were required to stay in “formation”: column or extended line except when under fire. By 1918 the lessons of warfare on the Western Front so you should allow any infantry unit rated Regular or Veteran morale to operate by standard Crossfire c&c rules.

Barrages: In this game I allowed 6 missions of SOS Barrages. These were pre-plotted against specific Terrain Pieces and the FO could call in the missions as normal as long as his field telephone had an uninterrupted line of communication to a specific point at the Northern end of the table. The opposing force could cut this line, but in this game that was a moot point. All fire was considered to be Shrapnel and would have been ineffective against units INSIDE buildings.

LMGs: Lewis Gun Sections are assumed to be armed with 2 Lewis guns. I have stolen an idea from someone else and decided that if the Lewis Gun’s previous action was movement then it will fire at 3d. If this action is this stand’s first of this initiative, or the last action was a fire action, the Lewis Guns will fire with 4d.

* AP Ammo: Both HMGs were assumed to have been issued some AP ammunition. This allowed them the opportunity to try and knock out the AC. I upped the Penetration to account for the very thin armor of the era. ACC/Pen -1/-4. You might consider limiting the number of fire actions available with AP ammo.

Bombers: Bomber Sections are +1 in Close Combat. They may also make a 4d direct fire attack against targets within 2 stands range or in the same terrain piece. If this attack is made against buildings that the bomber section is in contact with the target receives no protective cover modifier.

Untested variants:

Close Combat: Grenade equipped vs non-grenade equipped +1 (in terrain piece only) (eg Gurkhas vs Arabs in 1920; South Africans vs Ruga-Ruga in East Africa1916); Cavalry vs. Infantry +1 (in open or fields)

Cavalry: Cavalry may be treated with the following options: a. allow a free pivot as part of any move; b. Treat as Japanese when initiating Close Combat, that is any pin caused by reaction fire is ignored, any Suppression is treated as a Kill; mount/dismount is a move action; cavalry is +1 against infantry in the open during CC; lancers are +1 vs non-lancer cavalry in CC; British Cavalry units should have attached HMGs at the Company level, after 1916 they may have one LMG stand per Company (per Troop in 1918).

All that being said, I do believe the closer you stick to the rules as written, the more Crossfire shines. Leave the nitpicking to others.

Friday, August 14, 2009

Crossfire Game (Solo)

The Affair at Balad Chanaq, near the left bank of the Euphrates, Mesopotamia
Late September 1916
Gamed: August 13, 2009
Rules: Crossfire
Scale: 1 stand=1 section
Table: 3x5


Yes, the photos are terrible. I borrowed a camera and it looks worse than I thought.


The Board: South is Bottom photo (including Wadi Gharbiye at top), North (including Balad Chanaq) is Top photo
Shown at set-up


Ottoman Forces (defender)
3 under strength Platoons (3 rifle stands each, Regular morale) each with a +1 PC [39 points]
2 Maxim Sections (unattached) (Regular) [12 points]
1 Arab Band (4 rifle stands, Green) with a +1 Arab leader [12]
1 detail of Bombers (2 stands, Veteran) & +1 PC [10]
1 Company Command stand +1 [4]
1 German FO with 6 SOS Barrages (4 dice each)[3]
Reinforcements:
1 Turkish Platoon (4 stands, Regular) & +1 PC [14]
Total Points: 80 initial / 94 reinforced


British Forces (attacker)
1 Company Sikh Infantry (reduced)
3 Platoons (4 stands rifles each; fourth stand is Lewis Guns in First Platoon) & a +1 PC each [62 points]
1 Company Command Stand +2 & 1 Stand Rifles (Escort, Veteran) [9]
1 Rolls Royce Armoured Car [12?]
Total Points: 83

This game was a variation on the Bridgehead Scenario in the Crossfire rulebook. The British must take 4 pieces of Ottoman terrain and hold them for 5 consecutive initiatives. The Ottomans receive their reinforcements when the British take the fourth terrain piece.

In real-world terms the Sikh company was seeking to clear Turkish pickets away from the left flank of a British advance and also “show the flag” to local Arabs.

The Ottoman set-up was as follows:
The Arab band in occupied two of the buildings in the village of Balad Chanaq. A Turkish MG and the FO were in the third (and Southernmost) building that overlooked the Sikh Company’s approach. The Eastern Wadi (Wadi Sharqiya) was defended by a Platoon of Turks, another Platoon set-up in the fields just to the North of the West Wadi (Wadi Gharbiye). The remainder of the Turkish company (an MG and the remaining Platoon) defended the wall on the Southern edge of an orchard, just East of Balad.
British Set-up:
The Sikhs deployed in a loose line with the Company A on the Right Flank (East, facing Wadi Sharqiya), Coy. B the Left flank (facing Wadi Gharbiye), and Coy. C in reserve, in some brush near the center. The Armoured Car started at the center as well.

The British had the initiative and moved forward with Coys A & B into the scrub north of both of them. This brought some reaction fire, resulting merely in a pinned section in either company. The AC charged forward and began “hosing” Wadi Sharqiya but did not suppress any Turkish stands; the initiative then shifted as a result. Some desultory return fire occurred, to no result. The initiative returned to the Sikhs.


Action shifted to the Ottoman Right Flank for several initiatives. Sikh Company B fired at the Turks in front of them, suppressing one stand. They then launched a forward assault on the Wadi Gharbiye. One Sikh stand was pinned by reaction fire from the Turks but this was not enough to halt the charge. They struggled to take the position (there were two tied rolls) but the Turkish defenders were doomed since the Sikhs had bonuses for being Veteran and for their opponents having a suppressed stand.

Company B kept up the momentum by moving into the fields to the West of Balad Chanaq. There they came under 6 initiatives worth of SOS Barrages and HMG fire, all being coordinated from the southern-most building in Balad. The Sikhs eventually suffered one eliminated stand and several suppressions (all of which were handily rallied by their PC) they were also effectively held in place.

Unfortunately for the Turks, the British CC mobilized Sikh company C to continue the push on the Western flank. They pushed forward through the fire that was being brought to bear on coy. B. Then when moving into a more Northerly field Company C was hit by a coordinated crossfire from both Turkish HMGs. Two Sections were suppressed but the other half of the Platoon eventually occupied a palm grove just north of the Northern building of Balad Chanaq.


The Turks kept up desultory fire against their opponents in the West, losing the initiative many times due to a failure to Suppress (despite inflicting many Pins, which the Sikhs quickly rallied from) or failure to rally. The unpinned remains of Sikh Company C launch an assault against the Arabs in the northernmost building in Balad. There is a brief struggle but the Arabs are defeated and the building occupied.


As the SOS barrage lifts an assault is made by Sikh coy B against the HMG that has been tormenting it. Victory is quick. One section of Sikhs go to ground outside the building, the others move in to occupy thus occupying the fourth Turkish terrain piece. At the same time the AC has rushed forward and suppressed the Turkish HMG and a rifle section in the orchard. The Turkish platoon has turned to face the north but are now effectively held in place by the threat of fire from the Sikhs in Balad or the AC.


A full strength Turkish rifle section comes on board and assaults the Sikhs in the northern part of the village but they are handily defeated. This is followed by a Sikh assault on Wadi Sharqiya which wipes away the Turkish defenders. At this point the victory conditions have been met and also the situation is clearly hopeless for the Ottoman. Later Ottoman prisoners are escorted back into British lines. The local Sheikhs promise to be docile, though many British sentries still die in the night and rifles disappear by the dozen. The war moves by Balad Chanaq…