(above)
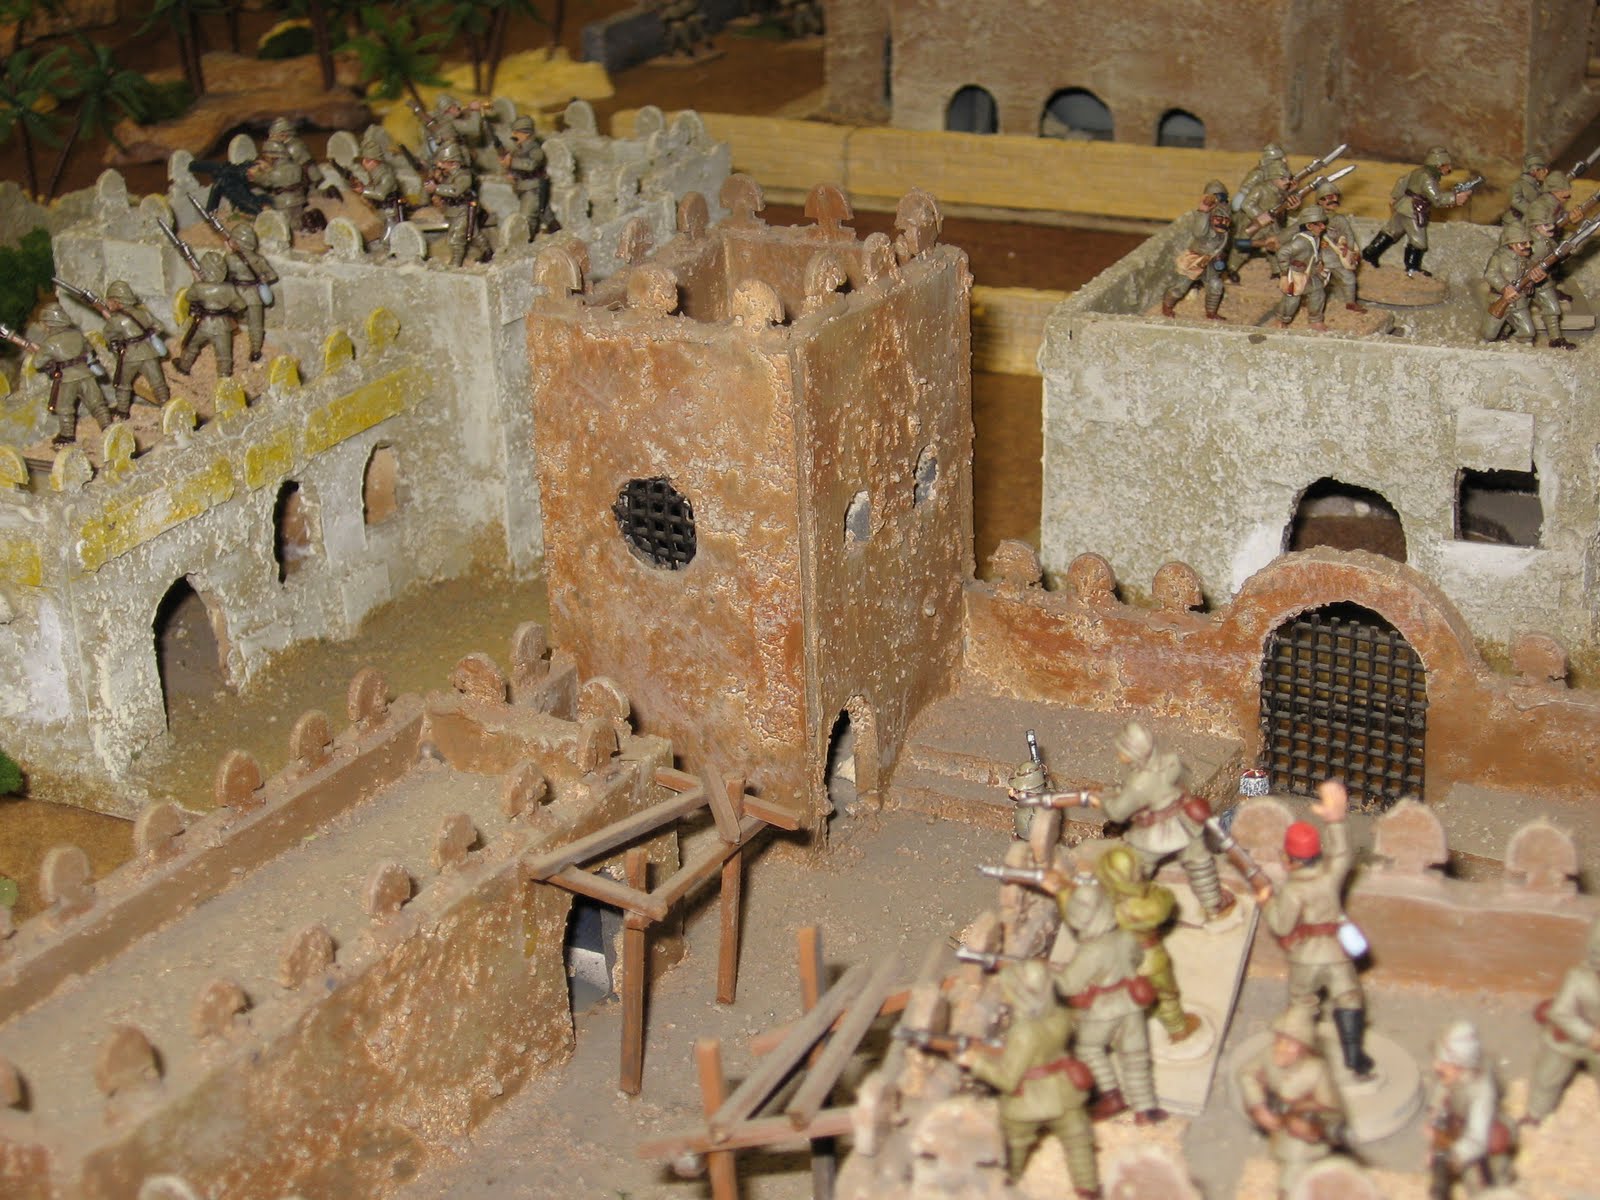
The initial Turkish set-up in the East side of the village. The building furthest away (& nearest the palms, later called the Market) took a lot of fire and shelling and was, late in the game, the scene of intense grenade attacks and melees. These Turks here were facing the advance of the Indian Platoon.
The initial Turkish set-up in the East side of the village. The building furthest away (& nearest the palms, later called the Market) took a lot of fire and shelling and was, late in the game, the scene of intense grenade attacks and melees. These Turks here were facing the advance of the Indian Platoon.
- Game Date & Location: April 24, 2010 at the Yankee Peddler Wargames Club
- Setting and Era: The Trans-Jordan, Early 1918; Arab Revolt
- Rules: Price of Glory (with some house rules governing Air Superiority and the rules from Chris Peers' To the Last Man governing fire at armored vehicles.)
- Attackers: Elements of the Arab Northern army (4 "sections" of Tribal askaris with mixed small arms, 1 section of Sharifian Regulars + a British Lewis gun team, 2 sections Agayl mixed small arms + an Agayl Lewis gun team, 1 small band of Agayl cavalry and camelry, Lawrence [of Arabia], 1 section of 2 Rolls Royce ACs, 1 Se-5a in a ground attack role); Attached Indian Army support units (1 Sikh HMG team, 3 Sections Sikh infantry + Lewis gun team, 1 Section Gurkha rifles, 2 Indian Army mountain guns)
- Defenders: Elements of the Railway Protection contingent (5 Turkish sections + a small number of grenadiers, 2 Turkish Maxim gun teams, 1 Turkish field gun); an understrength platoon of Asienkorps infantry, isolated in Balad al Bustan by railway sabotage (2 rifle groups, 2 LMG groups); 1 Albatross D V in support, about 6 3" sections of barbed wire (used to block the main street)
- Players: Jim (Ottoman Turks), Todd (Asienkorps and Turks), Mike (Arab Tribal infantry, Agayl Arabs and Sharifian Regulars) and Jeff (Indian Army and support assets). Scott Pasha allegedly GMed even though Jim really did at least as much.
- Figures: Arab Tribals: Jim's mix of Redoubt North Africans and Old Glory North Africans; Agayl: Battlehonors Arabs (foot and mounted) and Artizan / Brigade Games Arab Revolt range, Sharifian Regulars: Artizan, the British LMG team was Copplestone; Indian Army: Infantry & HMG: Copplestone and Brigade games Mountain Guns: 1 section Brigade Games 2.75", 1 section Battle Honors 3.7"; Ottoman Turks: Mostly Copplestone, some Brigade and some Woodbine Design Co.; Asienkorps: about half Brigade Games and half Pulp Figures German See-Battalion, which stood in for AK in helmets, a couple of NCOs were Battle Honors.
- Terrain & Scenics: from club collection, Buildings mostly built by Mike, little "olive trees" courtesy of Jim (who also lent me his camera, thanks Jim)
Please click on any photo to see a larger view

(above)
Balad al Bustan as seen from the North West, the Asienkorps initially were covering the North and West parts of the village.
Balad al Bustan as seen from the North West, the Asienkorps initially were covering the North and West parts of the village.

(above)
A section of Sikh Rifles (Brigade Games) and a 1:48 Rolls Royce Armored Car (Matchbox). They arrived from the South-East. The RR AC section was divided between the two allied players, but activated at the same time as each other (and the Se-5a).
 (above)
A dogfight underway between the two aircraft (early in the game). The Ottoman player rolled the higher roll, but not enough to establish air superiority that turn. The arrival of D V was a surprise to the Arab players. Both planes were eventually driven from the table by ground fire (first the German and then the British).

(above)
The left wing of the Arab contingent in Turn one. The closest troops are irregulars those in or near the palms were Agayl or Sharifian regulars.

(above)
Late in Turn two native insurgents rose up against the Turks inside Balad al Bustan. Initially they tried, unsuccessfully, to suppress an Ottoman HMG team, then they charged an Asienkorps rifle group that was moving through the village. A protracted melee took place and eventually the Germans were slaughtered (here is the last man). These insurgents were promptly shot to pieces over the next two turns.

(above)
Some time in turn two, just as the real carnage began. In the foreground the Sharifian regulars advance through the village palm grove, flanked by the Agayl mercenaries. These troops all met their ends assaulting the so-called "charnel house" that was defended by AsienKorps regulars. (you can see this key locale just above the Se-5a's right wing-tip in the photo below.)

(above)
The Se-5a achieved air-superiority after the Albatross was damaged by ground fire. Here it engages in strafing run against Turks defending the Olive groves just to the West of the "Charnel House". You can see the Battle Honors arab figures to the left of the plane, in Black over White.
 (above)
The "Charnel House" so-called because three different Arab units expended themselves against it (over the course of turns four, five and six). These were the two Agayl foot units and the Sharifian regulars. This position really commanded the Western end of the village and was instrumental in repulsing the Arab assault on the Western olive groves. In the photo you can see the remnants of the Agayli cavalry, inside the olive grove where they ended up after the Turks defending the stone wall there broke and ran. An Asienkorps unit moved into the ruins to the North of this grove and decimated (with the help of other units) the Agayli riders. This marked the high water mark of the Arab attack on the Ottoman right. The irregulars broke against the walls of the olive groves where they were done in by MG and rifle fire from within the village. The table between South edge and Western olive groves were littered with around 25 dead tribal Arabs by games end. They were constantly being forced to check Morale, failing and losing their activations, and thus subject to a murderous fire without cover.
 (above)
This building (we'll call it the Market) was the key to the Eastern side of the village. It was flanked by a small orchard (in the foreground) which held a Turkish section for much of the game, but they were eventually wiped out by fire from the Rolls Royce. In the late middle part of the game (probably around turn four or five) Jeff charged this building with a section of Sikhs and took it from the defending Turks. He was promptly hit with an artillery strike and counter-charged by a grenade tossing section of Turks. A complex series of melees occurred with at one point the Gurkhas entering the fray and relieving some Turkish askaris of their heads, the building went back and forth finally ending up in the hands of the Indian contingent, but only after the loss of two complete sections (1 Sikh and 1 Gurkha). By this point the Turks in the Eastern sector of the village were completely wiped out, with only the Krupps field-gun remaining. In the background you can just see the last assaults by the Sharifian regulars against the Charnel House, amongst the bodies of the Agayl infantry.
 (above)
The last turn. By this point the Indians had effective control of all the village East of the main road (seen above). The Rolls Royce that had accompanied the Indians moved into the village and began to hose the "Charnel House". They were accompanied by a unit of Sikhs that had moved around the village to flank the remnants of the Ottomans, who had been hit hard by a strafing attack and the RR's mg. These Sikhs easily cleared a way into town while the fighting in the Market occupied the attention of the Turks. All the while the whistle of a train full of Turkish reinforcements could be heard, just off table. The game ended at 3 pm after around 7 turns. The Northern Arab Army was unable to meet it's victory condition of controlling the town before the train arrived. Most of the survivors were German.
Summation:
The rules worked well, but I think they worked best in situations that are more WWIIish such as urban fighting. We really got to try out things that hadn't occured so much in past games such as snap firing, aircraft rules (from the Iron Ivan Yahoo group [see below]), fire & movement tactics, and lots of melees.
I didn't really manage the initial set-up well, and thus made things a little harder for the Arab players, and I think the player who has played these rules least (Mike) probably suffered because of an unfamiliarity with the nuances of them. Todd and Jim (defending) both know these rules well and understood how important it was to suppress and involuntarily activate enemy troops. It was noted that the Arabs should have had more modern rifles.
P-o-G Air Rules
from the Iron Ivan Yahoo Group:
- "Ha ha. No, there is no need to buy the main WWII rules just for that. Its been asked before for WWI aircraft, really I should just put together something for it. I have tried to decide how to make WWI aircraft a little different..... the following would be a WWI synopsis, somewhat modified from the WWII....
- Basically, the WWI plane comes on the board, makes an attack, then exits before the start of every turn (or how many turns you nominate, or every other turn, whatever works for the scenario).
- Onboard, the plane moves in a straight line and may attack any unit along that line, but only using each weapon group once. All MGs are a single group, bombs would be another group. Figure RoF 2 for each MG (yes, they should be 3 or 4, but this is how they work for aircraft).
- Now then, the MGs have an ACC 4, and are modified by cover as normal. Bombs are ACC 3, except they are not affected by the cover modifier of buildings.... if you hit you instead have to penetrate the roof.
- Target must save vs Guts as normal with -2 for every MG fired, -1 per casualty.... the MM of the class of bomb (Light, Medium, Heavy....) that is used. Figure light bombs for most WWI aircraft 50 lbs (25 kg or so)... maybe Medium bombs 100 lbs (50kg or so).
- Pins also activate the target unit into the following turn.
- However, ground units can shoot at the aircraft. Any unpinned unit may try to shoot the plane as it passes, it must be in LOS. It is activated (which counts into the following turn!) by trying to shoot the plane regardless of whether or not they hit it. Only units with at least 4 rifles, or 1 MG are allowed to try this. If you have artillery that you think was deployed in the AA role (most were not) they you may also fire this.
- You need 1's to hit... the unit of riflemen get a single d10, the MG would get a single d10, and the artillery would get a single d10, it is not for every model or for the RoF of the weapons.
- If the plane is hit once, it may make no further attacks and must exit the board never to return. If hit twice or more, it is destroyed. If hit by artillery it is considered destroyed automatically.
- If hit by rifle fire, the plane gets a saving throw vs the attack, on a 5 or less it ignores the hit. If hit by MG fire, on a 4 or less it ignores the hit. It may not attempt a save from an artillery hit.
- On a standard board, a destroyed plane will crash off board.
- Effectively for our purposes, the only differences from one plane to another are the number of MGs and what/how many/if bombs are carried.
- Once you use planes once, it becomes pretty clear how they work, they are very simple to employ. Just keep track of the bombs dropped, and how many turns you allow them to operate. Assume MGs have enough ammo for the entire game.
Chalfant"
Air Superiority: Each Turn the players will make a contested roll, each player will roll 1d6 with the following results:
| + 0,1,2 | Dogfight, no air superiority, place both planes on the table, higher roller may be placed behind lower roller, in the case of a tie place the planes apart |
| +3,4,5 | Air Superiority, remove the losing plane for this turn |
| +6 or more | Kill! Enemy plane crashes on the table. Roll 1d3: 1: Pilot survives unhurt 2: Pilot immobilized at scene of crash, but able to defend himself 3: Pilot killed in crash |


